
全栈小白
2023-03-15 14:53:07
一文学会文件上传-第三节:SpringBoot+阿里云OSS方式
原创声明:本人所发内容及涉及源码,均为亲手所撸,如总结内容有误,欢迎指出
唠嗑部分
之前两种方式我们都是将文件上传至服务器,今天我们来说一说云存储,以阿里云为例哈
阿里云OSS对象存储申请:
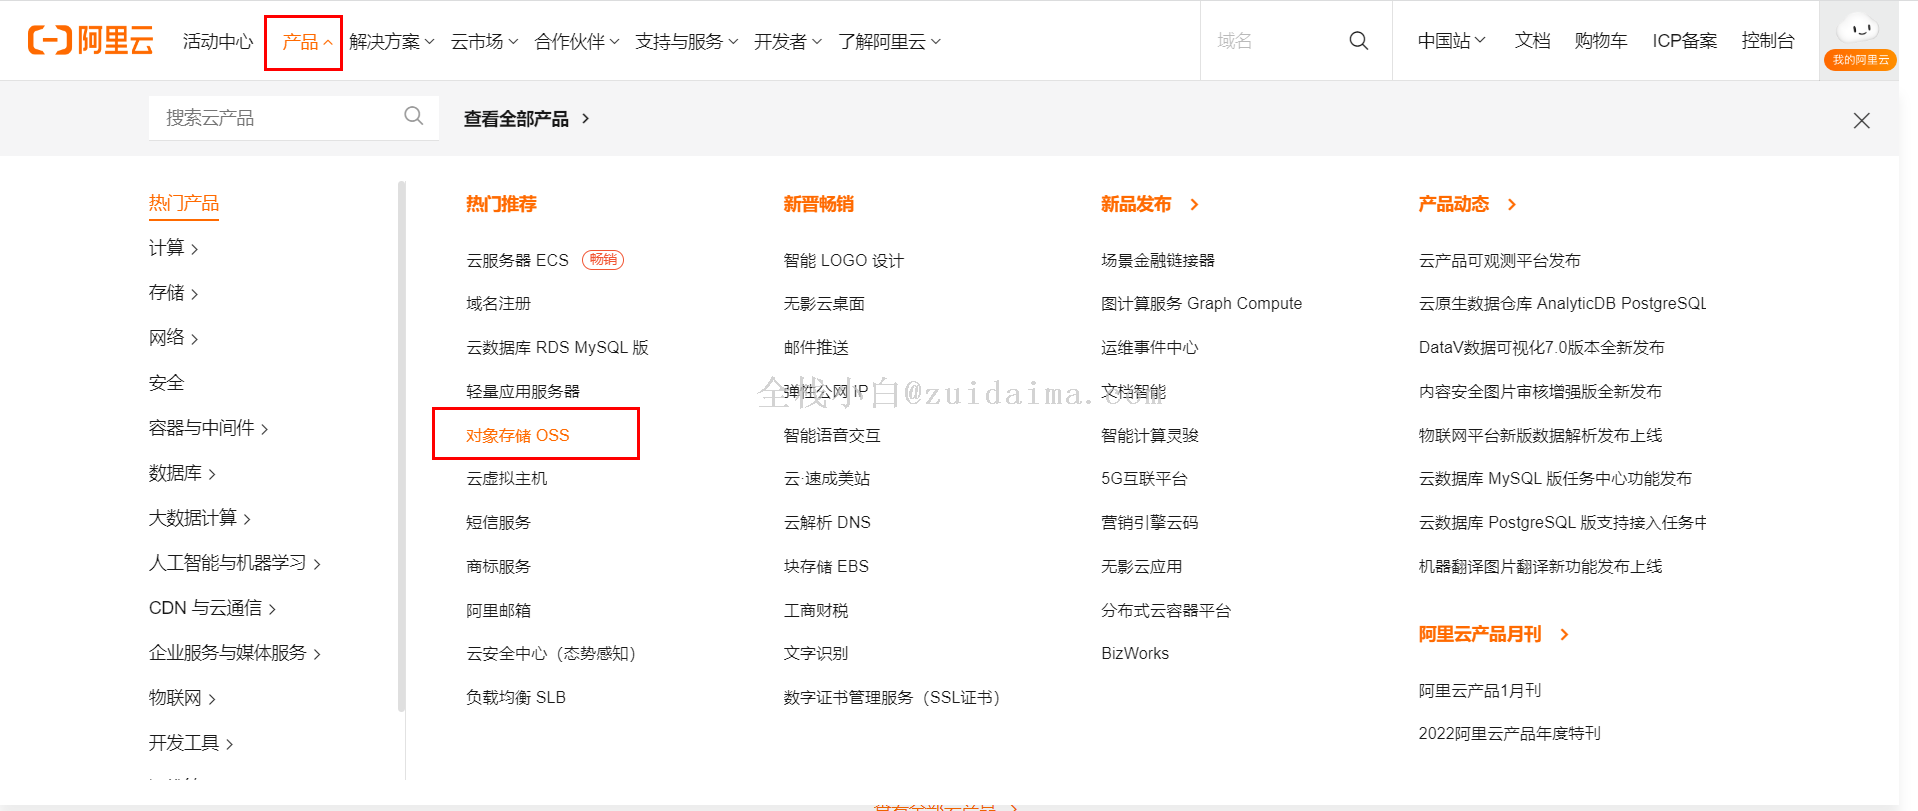
1、打开阿里云官方网站、登录,点击产品-选择对象存储OSS
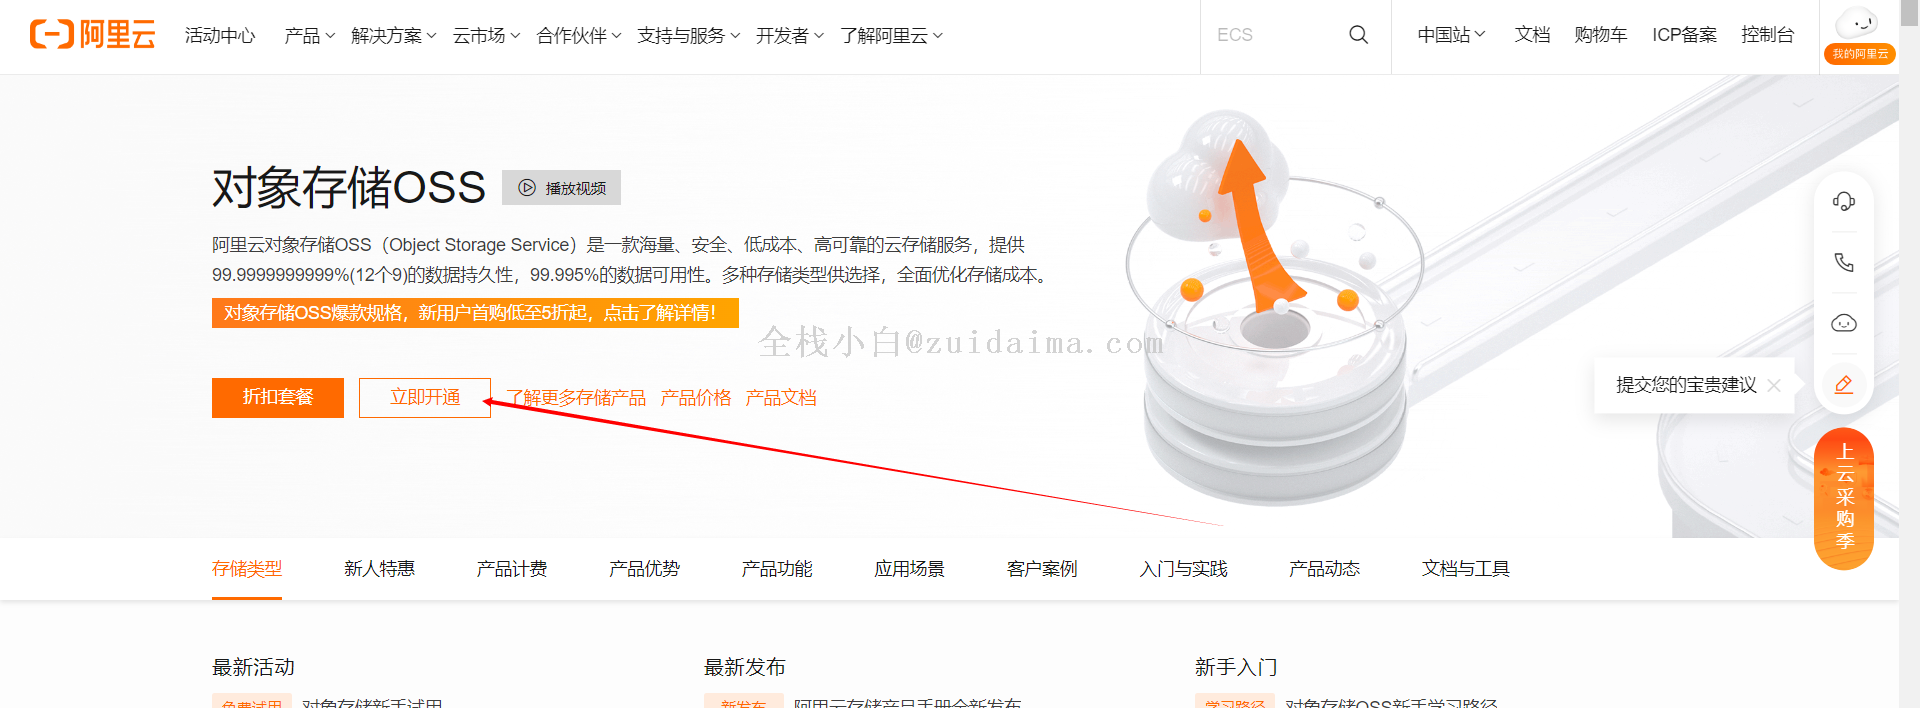
2、点击立即开通
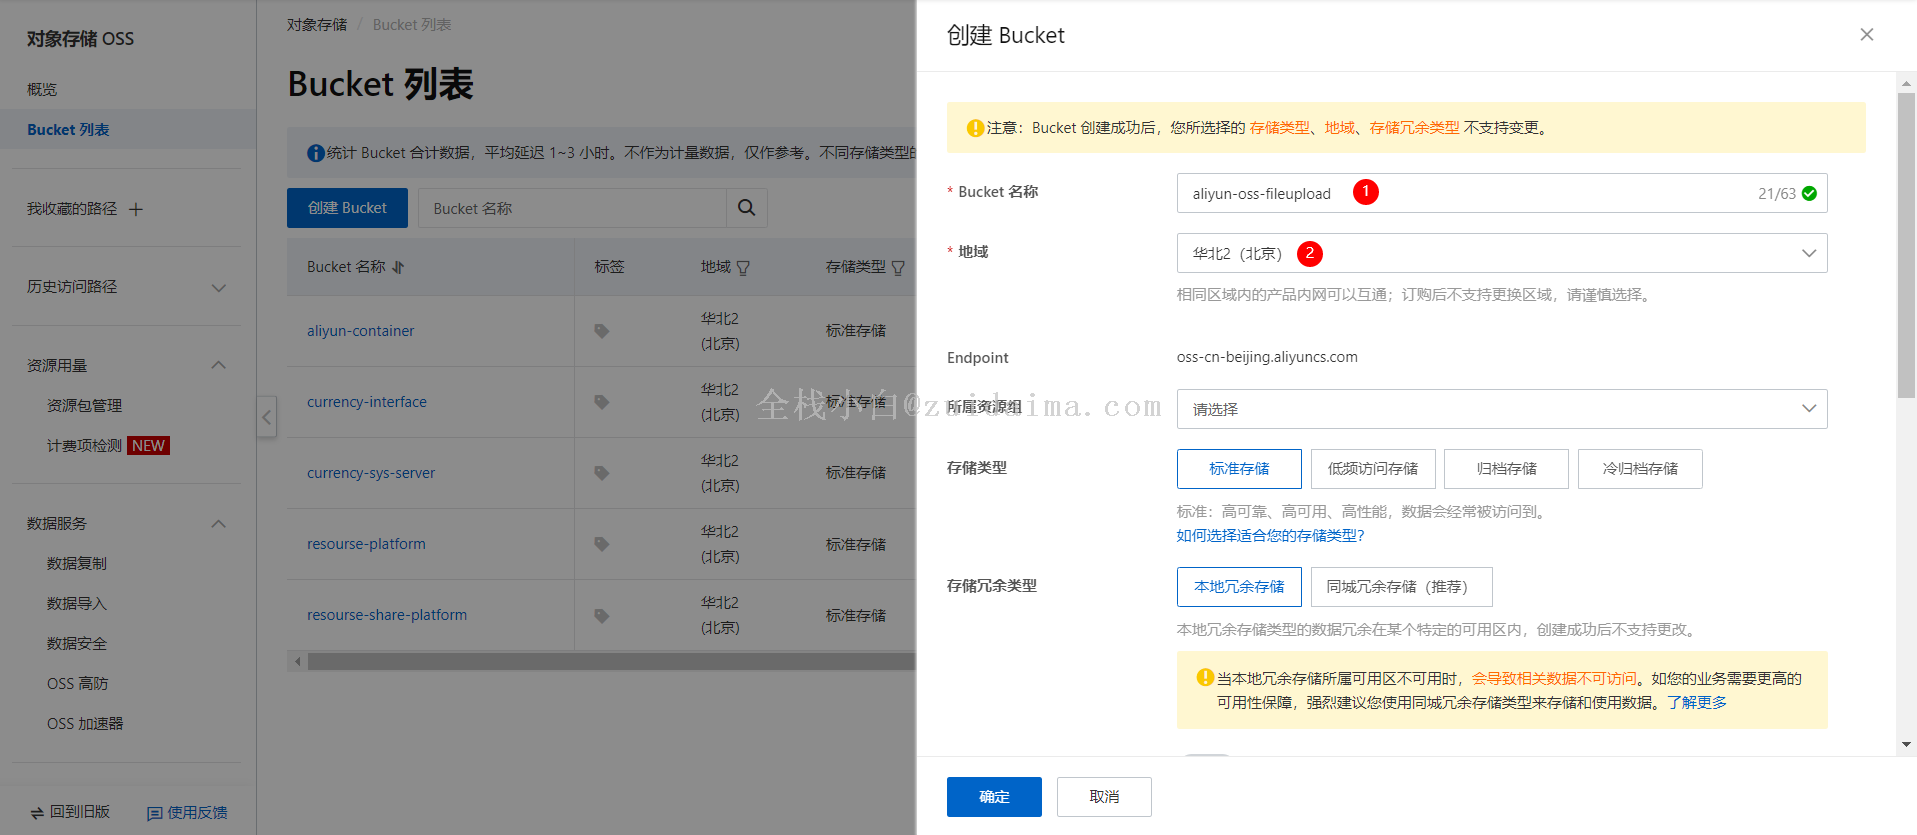
3、点击Bucket列表,立即创建(我之前开通过了,不知道新用户这个页面长啥样子,根据实际操作)

4、填写Bucket相关信息、读写权限选择私有

言归正传
1、创建SpringBoot项目&导入依赖
<?xml version="1.0" encoding="UTF-8"?> <project xmlns="http://maven.apache.org/POM/4.0.0" xmlns:xsi="http://www.w3.org/2001/XMLSchema-instance" xsi:schemaLocation="http://maven.apache.org/POM/4.0.0 http://maven.apache.org/xsd/maven-4.0.0.xsd"> <parent> <artifactId>spring-boot-starter-parent</artifactId> <groupId>org.springframework.boot</groupId> <version>2.4.2</version> <relativePath/> </parent> <modelVersion>4.0.0</modelVersion> <groupId>com.cxs</groupId> <artifactId>aliyun-oss-file-upload</artifactId> <version>1.0-SNAPSHOT</version> <dependencies> <dependency> <groupId>org.springframework.boot</groupId> <artifactId>spring-boot-starter-web</artifactId> </dependency> <dependency> <groupId>org.projectlombok</groupId> <artifactId>lombok</artifactId> </dependency> <!-- OSS依赖--> <dependency> <groupId>com.aliyun.oss</groupId> <artifactId>aliyun-sdk-oss</artifactId> <version>3.10.2</version> </dependency> </dependencies> </project>
2、编写配置文件application.yml
server:
  port: 2023
# 文件上传
aliyun:
  oss:
    #服务器地址, 我选择的是华北2-北京地址如下
    endpoint: http://oss-cn-beijing.aliyuncs.com
    #子账户名称
    accessKeyId: 写你的
    #子账户密码
    accessKeySecret: 写你的
    #桶的名字
    bucketName: aliyun-oss-fileupload
说说四个配置的位置

点击阿里云右上角头像,AccessKey管理,创建AccessKey
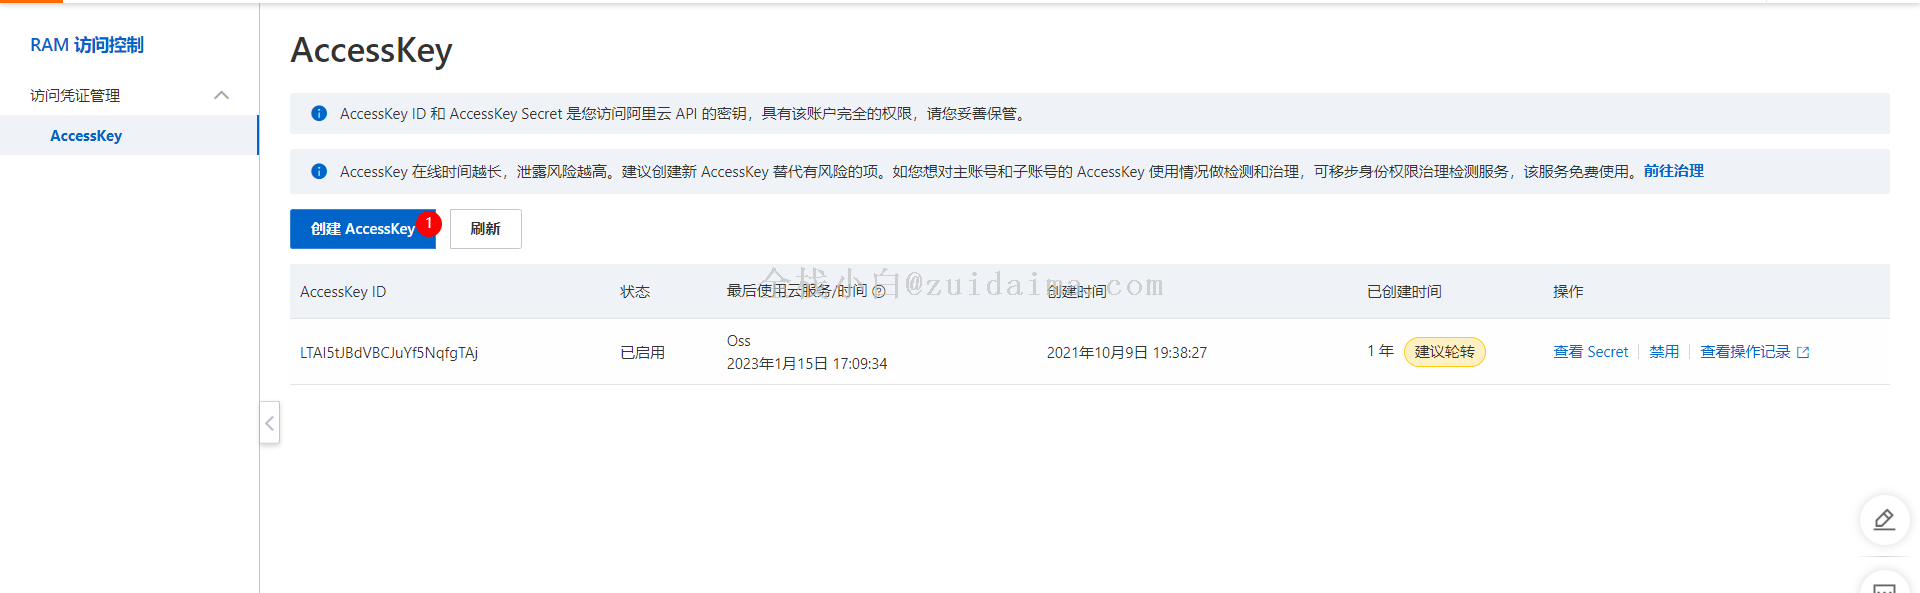
手机验证后,生成AccessKey和秘钥

3、编写文件上传方法
/**
  * 上传文件
  * @param fileName
  * @param content
  * @return
  * @throws Exception
  */
public String uploadAndUrl(String fileName, byte[] content)  throws Exception {
    // 创建OSSClient实例。
    OSS ossClient = new OSSClientBuilder().build(endpoint, accessKeyId, accessKeySecret);
    // 判断是否图片
    String postStr = fileName.substring(fileName.lastIndexOf("."));
    if (Arrays.asList(imgArr).contains(postStr)){
        // 创建上传文件的元信息,可以通过文件元信息设置HTTP header(设置了才能通过返回的链接直接访问)。
        ObjectMetadata objectMetadata = new ObjectMetadata();
        objectMetadata.setContentType("image/jpg");
        // 文件上传
        ossClient.putObject(bucketName, fileName, new ByteArrayInputStream(content), objectMetadata);
    }else {
        ossClient.putObject(bucketName, fileName, new ByteArrayInputStream(content));
    }
    // 设置URL过期时间为1小时
    Date expiration = new Date(System.currentTimeMillis() + 3600L * 1000);
    //返回url地址
    String url = ossClient.generatePresignedUrl(bucketName, fileName, expiration).toString();
    //关闭OSSClient。
    ossClient.shutdown();
    return url;
}
4、编写上传接口
@PostMapping
public Map<String, Object> upload(@RequestParam("file")MultipartFile file){
    Map<String, Object> result = new HashMap<>();
    result.put("code", 200);
    try {
        if (!ObjectUtils.isEmpty(file)) {
            // 获取源文件的名字
            String originalFilename = file.getOriginalFilename();
            if (StringUtils.hasLength(originalFilename)) {
                // 进行文件上传
                String url = fileUploadUtil.uploadAndUrl(originalFilename, file.getBytes());
                result.put("data", url);
            }
        } else {
            result.put("code", 400);
            result.put("msg", "文件不能为空!");
        }
    } catch (Exception e) {
        e.printStackTrace();
        result.put("code", 500);
        result.put("msg", "文件上传失败!");
    }
    return result;
}
5、前端页面结构
<form id="form">
    <input id="file" type="file" name="file" style="display: none;"/>
    <label for="file">
        <img id="img" src="" title="+" width="300" height="150" style="cursor: pointer;"/>
    </label>
    <button>上传</button>
</form>
6、文件预览同上篇文章:
7、文件上传,本次采用axios
 // 表单的提交事件
$("#form").submit(function (e){
    // 阻止表单submit事件的默认行为,否则会有个刷新的现象
    e.preventDefault()
    // 创建formdata,FormData会将form表单中带有name的字段自动处理成每一项
    var formData = new FormData(this);
    if(!currentFile) return window.alert("请选择文件再上传");
    // 发送ajax请求上传
    axios.post('/upload', formData, {'Content-type' : 'multipart/form-data'}).then(res => {
        console.log(res.data)
    }).catch(err => {
        console.log(err)
    })
})
测试&结语
上传功能测试
1、测试结果
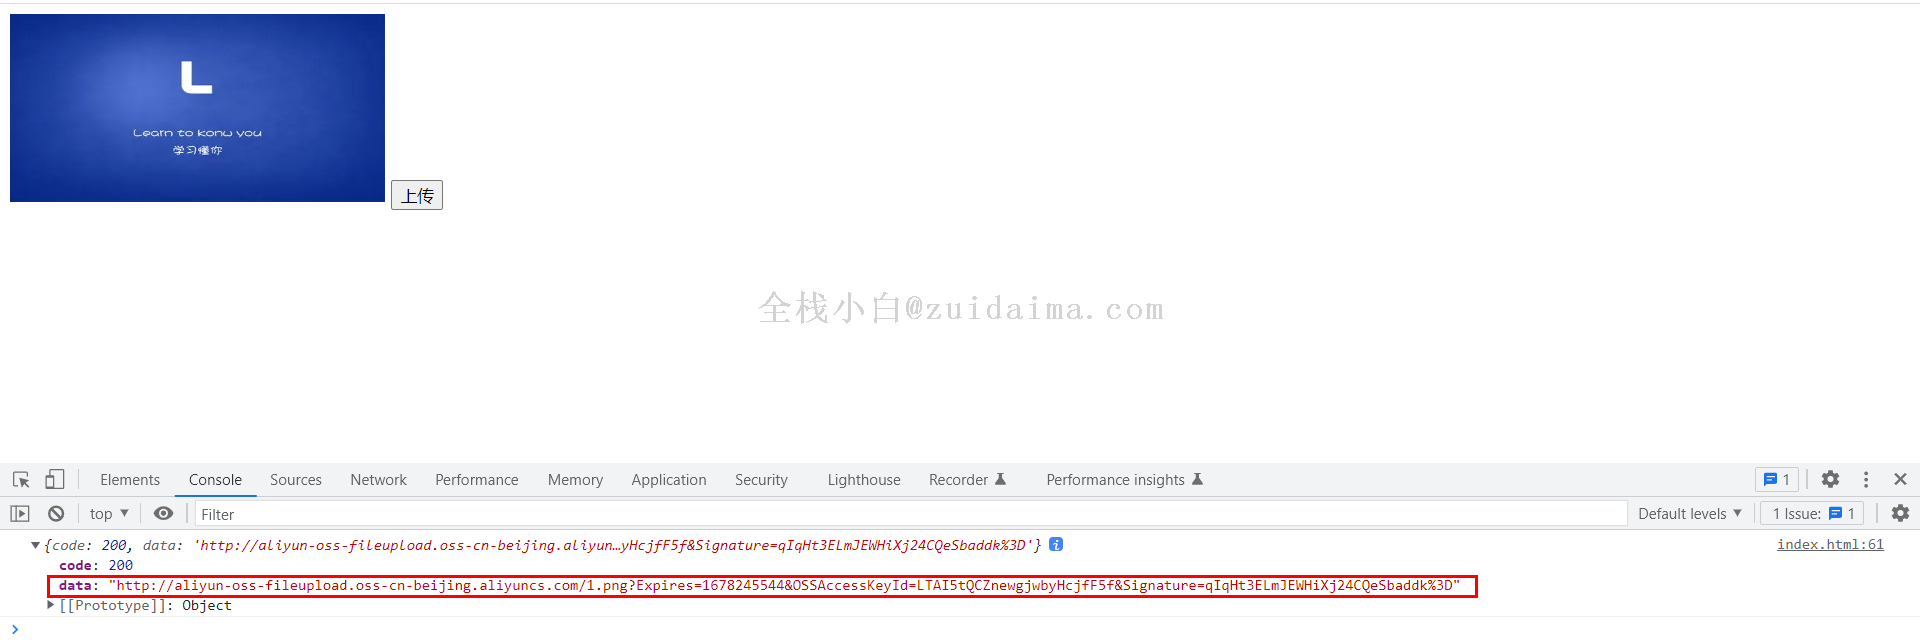
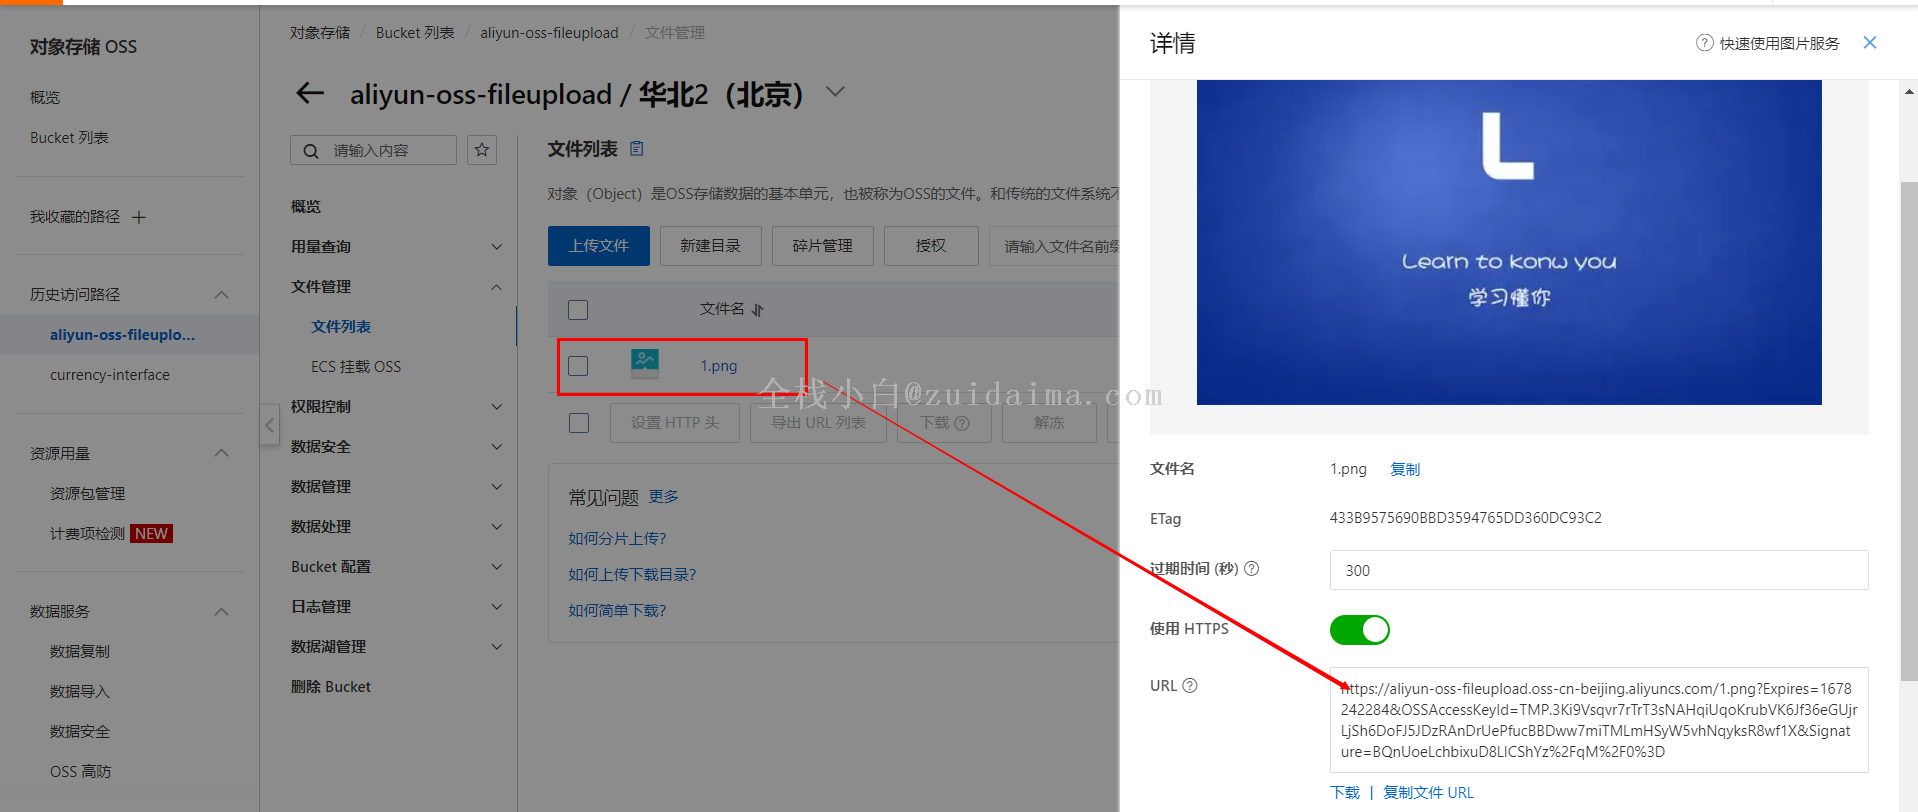
2、登录OSS控制台查看
结语
1、源代码获取:https://gitee.com/whole-stack-of-white/file_upload_demo
已有1人打赏


 最近浏览
最近浏览
roshan LV3
2024年12月6日

paul_gaopeng LV5
2024年7月2日

菜鸟蛋 LV2
2024年5月23日
youwuzuichen LV11
2024年2月18日
80730176 LV7
2024年1月2日
Luis虎子 LV16
2023年11月24日

3334004690 LV11
2023年10月31日
做你的景天 LV7
2023年8月31日
矿泉水 LV30
2023年8月11日
zhos0212 LV19
2023年7月21日